Design - Classical Variables and Operations
Quantum variables and operations lie at the heart of the Qmod language but they are not enough for designing any quantum algorithm one has in mind. To complete the picture we need also the ability to perform classical control flow with classical operations over classical variables. These are the operations that a typical Python user would expect to have like for loops and if-else statements over int or float variables.
In Qmod, there are equivalent types for the common Python types int, float and bool and they are denoted by int, real and bool in the native syntax and by CInt, CReal and CBool respectively in the Python SDK. In addition, arrays of classical values are also supported as well as more configurable data structures called Structs (which are the equivalent of Python dataclasses without methods). The full list of all the classical variables and types supported in Qmod can be found here.
For now, the only two classical operations supported in Qmod are repeat which is the equivalent of a Python for loop and if-else statements. The detailed description of both can be found here.
Let's understand how to manage classical control flow in Qmod for our benefit through the following concrete example.
Concrete Example
Our task is to create a quantum array with \(10\) qubits in the state of \(|1010101010\rangle\), i.e. a quantum state with alternating qubit states of zeros and ones.
How shell we approach this? Knowing that a general qubit array can be easily initialized to the state of all zeros i.e. \(|0000000000\rangle\), we can see that we need to flip the state of every second qubit, i.e. of all the qubits in an even position (the qubit in the \(0th\) position, \(2nd\) position, \(4th\) position etc.).
So we will approach this task in two steps. First we will create a function called apply_condition that receives a qubit and its position within the qubit array, and if the position is even then it flips its state. Secondly, we will go over all the qubits in the qubit array and apply the function on each qubit.
The apply_condition function receives a qubit variable named qubit and a classical integer variable index, and if the condition that the variable index is an even number, then there is a X gate applied on the qubit which flips its state.
from classiq import *


@qfunc
def apply_condition(index: CInt, qubit: QBit):
    if_(condition=index % 2 == 0, then=lambda: X(qubit))
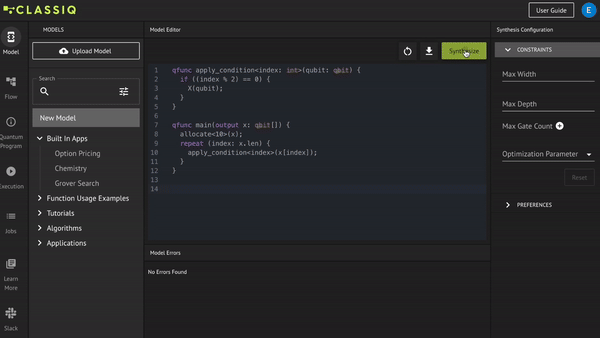
qfunc apply_condition<index: int>(qubit: qbit) {
  if ((index % 2) == 0) {
    X(qubit);
  }
}
The condition of wether the variable index is even is evaluated using the modulo operation %, that calculates the reminder of the integer index divided by \(2\). One can notice that in the Python SDK there is a use of the lambda: construct before the operation X(qubit). As described in the Quantum Variables and Functions Tutorial, in the Python SDK every function that is given as an argument for another function needs to have the prefix of lambda:.
The argument of the main function is a qubit array named x, and it is initalized to the state \(|0000000000\rangle\) with \(10\) qubits using the allocate function. Then the classical operator repeat is applied, where function apply_condition is applied \(10\) times, one time per qubit in the qubit array x.
@qfunc
def main(x: Output[QArray]):
    allocate(10, x)
    repeat(count=x.len, iteration=lambda index: apply_condition(index, x[index]))
qfunc main(output x: qbit[]) {
  allocate<10>(x);
  repeat (index: x.len) {
    apply_condition<index>(x[index]);
  }
}
The repeat operator has two arguments. First, the number of repetitions is specified, and in this case and it set to the length of the qubit array x. Secondly, the statement (or statements) that are being repeated are specified, and in the above it is the apply_condition function with the two arguments index and the corresponding qubit x[index]. One may notice the different syntax between the Native syntax and the Python SDK in declaring the counting index with the variable index.
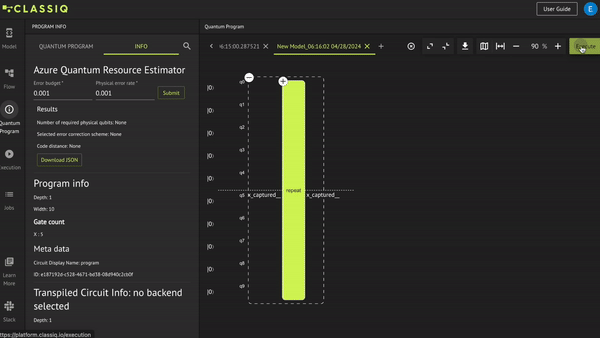
That's it, the algorithm is ready and now it can be synthesized and viewed:
quantum_program = synthesize(create_model(main))
show(quantum_program)
And the quantum program can be executed on the default simulator in order to evaluate the results:
results = execute(quantum_program).result()[0].value
print(results.counts)
The only measured bit string is \(0101010101\), which with the Classiq notation should be read from right to left when interperted, hence it corresponds to the state \(|1010101010\rangle\) which is exactly what we have tried to achieve!
Summary - Classical Variables and Operations
The following summarizes the above example in terms of classical variables and operations:
-
Qmod supports the use of classical variables. In the above example, the integer variable
indexis explicitly declared and used. The length of the qubit arrayxis also a classical integer variable that is used implicitly within therepeatoperation. -
Qmod supports the use of classical operations that receive classical variables and quantum operations that are applied according to the classical operation logic. In the above example, the
ifclassical operation applies the quantum operationX(qubit)if the classical variableindexis even, and the classical operationrepeatapplies the quantum operationapply_condition10 times - the result of evaluatingx.len.
All Code Together
from classiq import *


@qfunc
def apply_condition(index: CInt, qubit: QBit):
    if_(condition=index % 2 == 0, then=lambda: X(qubit))


@qfunc
def main(x: Output[QArray]):
    allocate(10, x)
    repeat(count=x.len, iteration=lambda index: apply_condition(index, x[index]))


quantum_program = synthesize(create_model(main))
show(quantum_program)

results = execute(quantum_program).result()[0].value
print(results.counts)

write_qmod(create_model(main), "classical_variables_and_operations")
qfunc apply_condition<index: int>(qubit: qbit) {
  if ((index % 2) == 0) {
    X(qubit);
  }
}

qfunc main(output x: qbit[]) {
  allocate<10>(x);
  repeat (index: x.len) {
    apply_condition<index>(x[index]);
  }
}