Design - The Qmod Language
The first step in quantum software development is to design your software and your algorithm. Classiq features a unique high-level modeling language called Qmod that naturally captures the core concepts of quantum algorithm design. There are two ways to design in Qmod:
-
Directly, via the Classiq IDE using the Qmod native syntax
-
With the Classiq Python SDK package, which gives access to the Qmod language via Python
Once you finish designing your algorithm, you send it to the Classiq synthesis engine (compiler) to create a concrete quantum circuit implementation - a quantum program.
Concrete Example
First, understand Qmod through an example.
The task is to design a quantum algorithm that coherently computes the arithmetic operation \(y=x^2+1\), for a quantum variable \(|x\rangle\) that is a superposition of all the numbers between \(0\) and \(7\):
The expected output is
where \(|x\rangle\) is entangled to \(|y\rangle\).
This may sound complicated, but the following few lines of code in Qmod create the desired algorithm with Classiq:
from classiq import *


@qfunc
def main(x: Output[QNum], y: Output[QNum]):
    allocate(3, x)
    hadamard_transform(x)  # creates a uniform superposition
    y |= x**2 + 1


qmod = create_model(main, out_file="design")
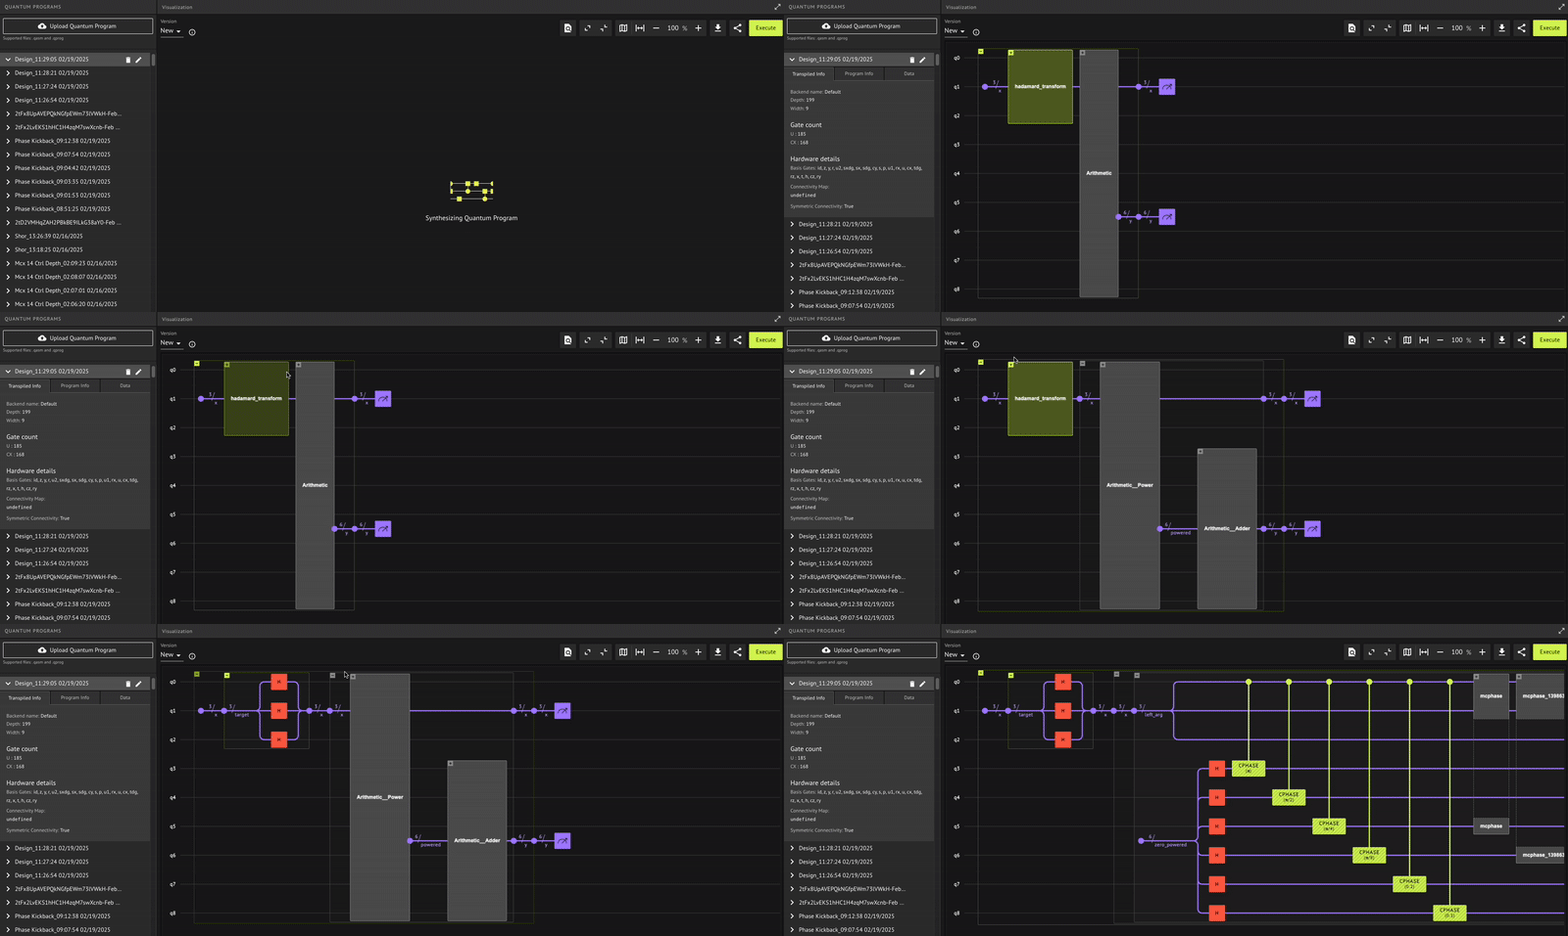
Synthesize and view the quantum program:
qprog = synthesize(qmod)
show(qprog)
Opening: https://platform.classiq.io/circuit/2twknBxx0BebBoCZKWi0ECimeAk?version=0.70.0

Key Qmod Principles
The above code is a quantum model written in Qmod. A model is composed of quantum functions with at least one quantum function called main. Define quantum functions in Python using regular Python functions decorated with @qfunc, and in the native Qmod syntax define them with the qfunc keyword.
Quantum functions manipulate quantum objects that are represented using quantum variables. Declare and initialize each variable before it is used.
The following points explain the principles:
1) Include a qfunc decorator in Python or keyword in the native syntax
You can see the qfunc decorator (@qfunc) in the Python implementation and the corresponding keyword in the native implementation. This indicates to Qmod that we are dealing with quantum functions that manipulate quantum objects.
2) Include a main function
Every quantum algorithm written in Qmod must have a main function. From this main function, create the quantum program using the synthesize(create_model(main)) command in Python or by clicking Synthesis in the IDE.
3) Declare the arguments of the main function as outputs
In the above example, the two arguments of the main function—x and y—are both quantum variables. Their type is QNum(qnum in the native syntax), which announces a quantum number (see Quantum Variables). In addition to the type, declare the variables of the main function as output, indicating that these quantum variables are not initialized outside the scope of the function.
Types of Quantum Variables
Qmod has these types of quantum variables:
-
QBit(qbit) -
QArray[QBit](qbit[]) -
QNum(qnum)
4) Declare each quantum variable before using it
You can declare the variables x and y as arguments of the main function or in the scope of a function (see Quantum Variables).
Declaration Within the Scope of a Function
You can declare a quantum variable within the scope of a function with
=== Python x = QNum('x')
=== Native x:qnum;
5) Initialize each quantum variable
After declaring a quantum variable, initialize it using one of several ways. Two are shown in the example above:
-
xis initialized with theallocateoperation. -
yis initialized with the|=(=in native) numeric assignment.
Types of Initializations
Ways to initialize a quantum variable:
-
With
allocate -
With
prepare_stateorprepare_amplitudes -
With numerical assignment
-
As the result of a numeric operation, as in the example above
-
With the
bindoperation (->in native) -
With any function that declares its quantum variable argument as
output
Verify Your Understanding - Recommended Exercise
Write within the IDE with the native Qmod syntax a quantum algorithm that coherently calculates \(y=2x+4z+2\) where \(x\) and \(z\) are quantum numbers represented with 5 qubits each, and they are initialized in a superposition of all possible values.
Next Steps
Now that you are familiar with the foundations of Qmod, you can continue with
-
Quantum Variables and Functions
-
Quantum Operations
-
Classical Control Flow