The Classiq executor supports execution on Amazon Braket’s cloud simulators and hardware.
Backends may sometimes be unavailable. Check the availability windows with Amazon Braket.
Usage
Execution on Amazon Braket requires an AWS account, and a role that Classiq can assume for execution.
from classiq import AwsBackendPreferences

preferences = AwsBackendPreferences(
    backend_name="Name of requested simulator or hardware",
    aws_access_key_id="Amazon access key ID for the user with Braket access",
    aws_secret_access_key="Secret access key for the user's key ID",
    s3_bucket_name="S3 bucket name to save the results",
    s3_folder="The folder path within the S3 bucket, where the results will be saved",
    job_timeout="Timeout for execution (Optional)",
)
Initial Account Setup
Before first use, the platform needs your permission to connect to your
AWS account. This is done by creating a cross-account role.
Classiq provides with the attached CloudFormation AssumeRole.cf.yaml file. It only has the permissions needed for Braket.
To create the cross-account role that only Classiq can use, deploy the CloudFormation file to your account:
- Download the AssumeRole.cf.yaml file.
- Install AWS CLI.
- Contact Classiq support to obtain these parameters:
CORRECT_TRUSTED_ACCOUNTCORRECT_EXTERNAL_ID_VALUE
- Execute this command:
aws cloudformation create-stack --stack-name ClassiqBraketRole --template-body file://AssumeRole.cf.yaml --capabilities CAPABILITY_NAMED_IAM --parameters ParameterKey=TrustedAccount,ParameterValue=${CORRECT_TRUSTED_ACCOUNT} ParameterKey=ExternalId,ParameterValue=${CORRECT_EXTERNAL_ID_VALUE}
The required parameters may differ between users.
Contacting Classiq support is required!
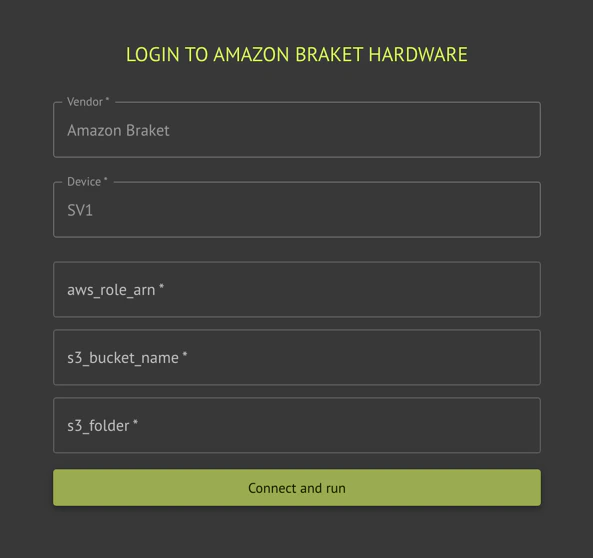
Required Credentials
When executing via the platform using AWS Cloud, there are several
required credentials:
aws_access_key_id
- Create a user with Braket full access
- Create AWS secret key for this user
- Fill the access key id as you got in the earlier steps
aws_secret_access_key
- Fill the Secret access key from the steps above
s3_bucket_name
- Create a new bucket. Its name must start with
amazon-braket-.
- Use the bucket name as the
s3_bucket_name.
This is the bucket that saves the execution results.
s3_folder
- Enter the path to the folder in the
S3 bucket.
This is the path in the bucket where the execution results are
saved.
For further support, contact Classiq support.
Device emulation (emulate)
Set emulate=True on AwsBackendPreferences to use Classiq’s device-aware Braket circuit preparation for the selected Amazon Braket device: the circuit is translated using constraints from that device before the job is submitted. This path differs from the default Qiskit–Braket conversion and can be required for some programs targeting specific hardware.
- Default
emulate=False: standard adapter from Qiskit to Braket.
emulate=True: use Classiq’s emulator-style translation for the chosen device. If compilation fails, try without emulate or another backend; see the error message from the executor.
Behavior depends on the Braket device and circuit; refer to Amazon Braket documentation for device capabilities.
from classiq import AwsBackendPreferences

preferences = AwsBackendPreferences(
    backend_name="Ankaa-3",
    aws_access_key_id="…",
    aws_secret_access_key="…",
    s3_bucket_name="amazon-braket-…",
    s3_folder="results",
    emulate=True,
)
Supported Backends
The Classiq executor supports any available gate-based Amazon Braket simulator and quantum hardware.
Included hardware:
- “Forte 1”
- “Emerald”
- “Ankaa-3”
- “Garnet”
Included simulators: